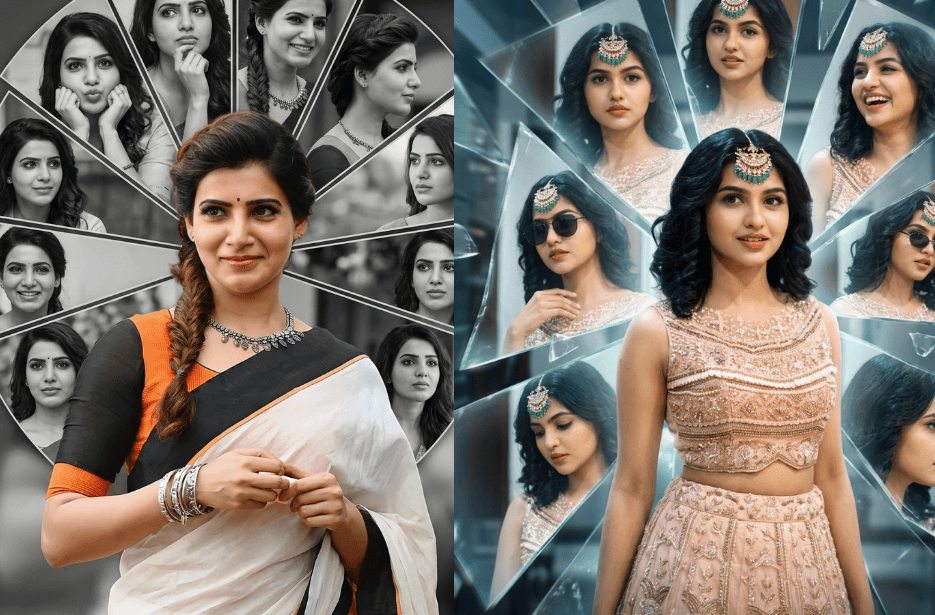
What if one photo could tell completely different stories at the same time? That’s the magic of AI-generated split-frame portraits. With just a single image, you can transform your photo into a striking visual that shows different sides of yourself. They are a creative way to express mood, personality, and imagination. Whether you are experimenting for fun, upgrading your social media profile picture, or exploring digital art, the AI prompts mentioned below can help you create something truly unique.
Version 1: Mesmerized, My Queen
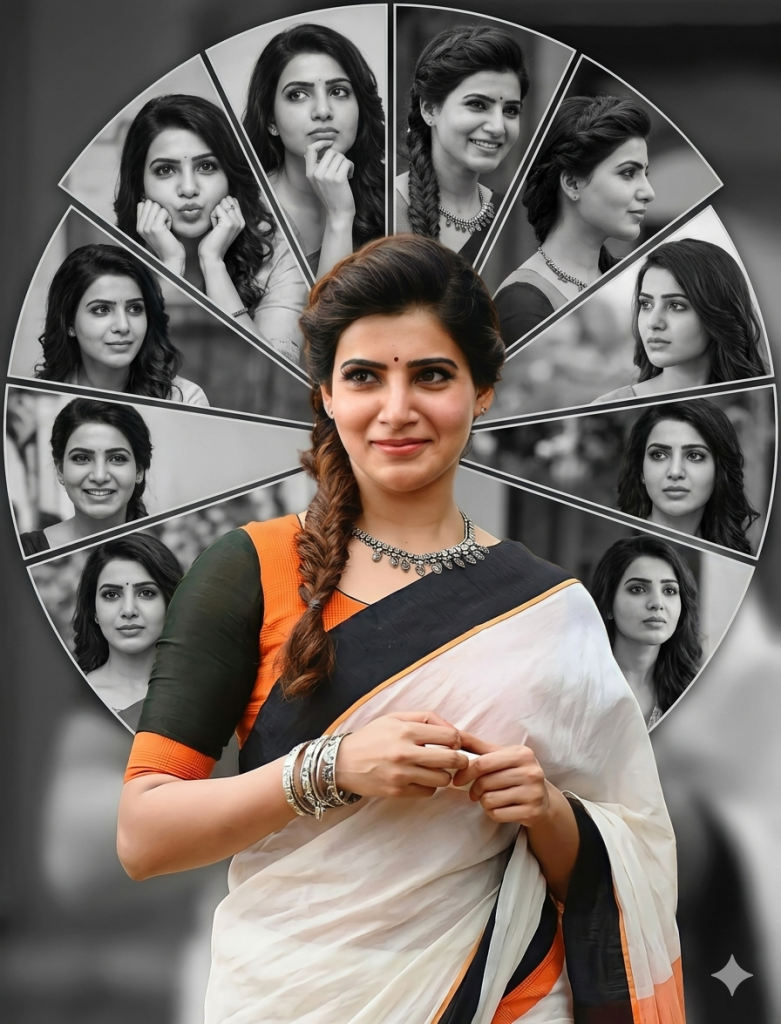
Design a circular collage background behind the subject, divided into multiple radial slices. In each slice, include different black-and-white portraits of the same person (from the reference image) with varied expressions, angles, and poses (smiling, looking sideways, cute pose (puppy face), thinking pose, etc.).
Keep the center subject in full color while all background images remain monochrome (black and white) for contrast. Add soft depth-of-field blur in the background and maintain sharp focus on the main subject.
Use soft lighting, high detail, and a modern, cinematic photo-editing style. Ensure clean edges, smooth skin tones, and a professional Instagram-ready aesthetic. The overall composition should feel creative, symmetrical, and visually striking.
Style keywords: ultra-detailed, DSLR quality, 4K, sharp focus, studio lighting, portrait photography, modern graphic design, radial collage layout
Version 2: The Future of TN
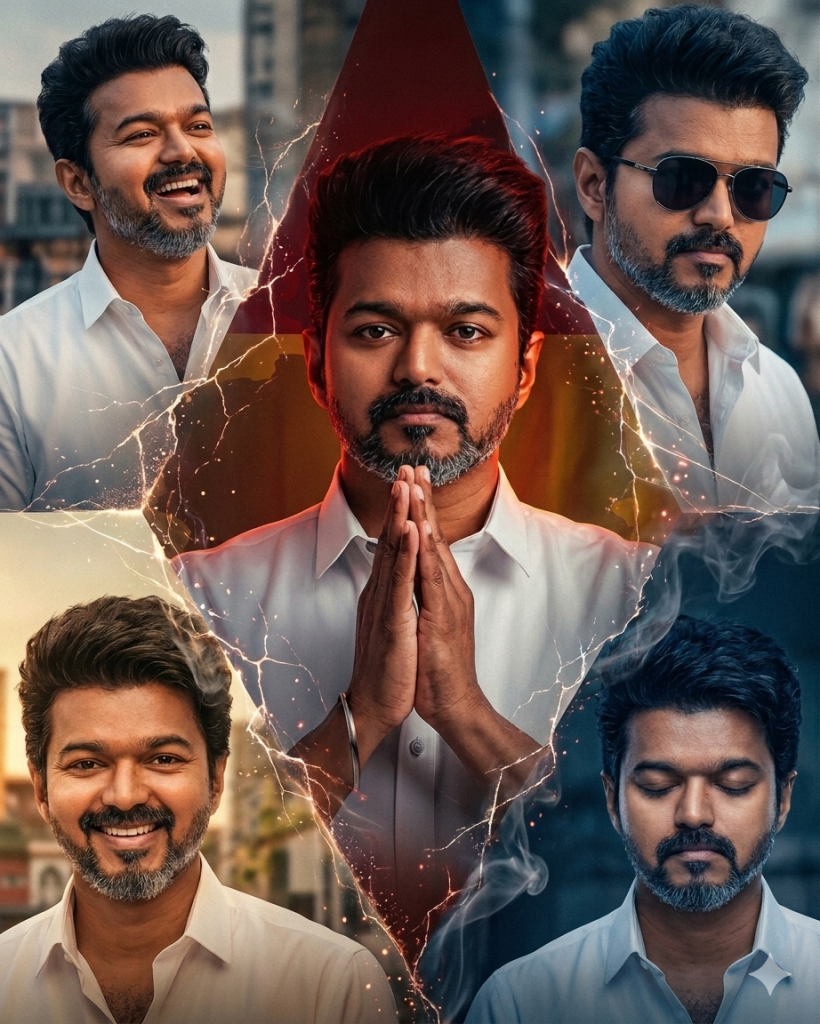
Divide the composition into multiple sections, but ensure the central portion is visually dominant and draws the most attention. Each section should feature a different version of the same subject, while maintaining consistency with the reference image. These variations should remain well-balanced within the frame and not overpower the central focus.
Include different poses and expressions such as a happy smiling face, a serious intense look, a candid laughing moment, a calm neutral expression, and a stylish pose wearing sunglasses. Each variation should feel natural and distinct while still clearly representing the same person.
Blend the sections seamlessly using creative transitions like cracks, smoke, light streaks, or soft gradients to create a cohesive composition. Use cinematic lighting, depth, and high-detail rendering to enhance the visual impact. The final output should be ultra HD, sharp, and visually striking, creating an artistic and emotionally engaging portrait.
Version 3: Princess of Hearts
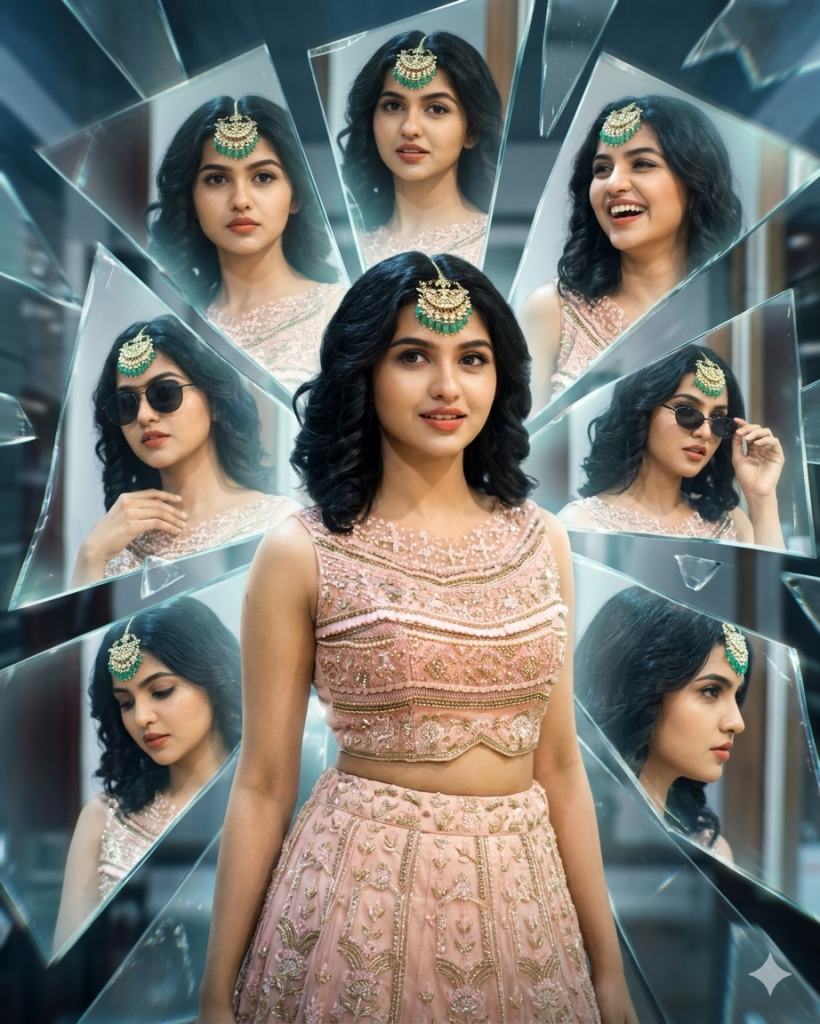
Behind the subject, create a mirrorverse environment filled with multiple mirrored versions appearing on glass shards and reflective surfaces. These reflections must stay in the background only, forming a layered backdrop, and should not overlap or dominate the main subject. Each reflection should show a different pose and expression, including a serious face looking straight, a natural laughing expression, a stylish pose wearing sunglasses, a thoughtful downward gaze, and a sharp side profile with an intense look.
Keep the main subject in full natural color with sharp focus, while the mirrored versions in the background have a subtle glow, slight distortion, and reflective effects. Use cinematic lighting, depth of field, and a futuristic reflective environment to enhance the visual impact. The final output should be ultra HD, highly detailed, crisp, and visually striking, maintaining realism while blending surreal mirror effects.
Version 4: The Unstoppable Dragon
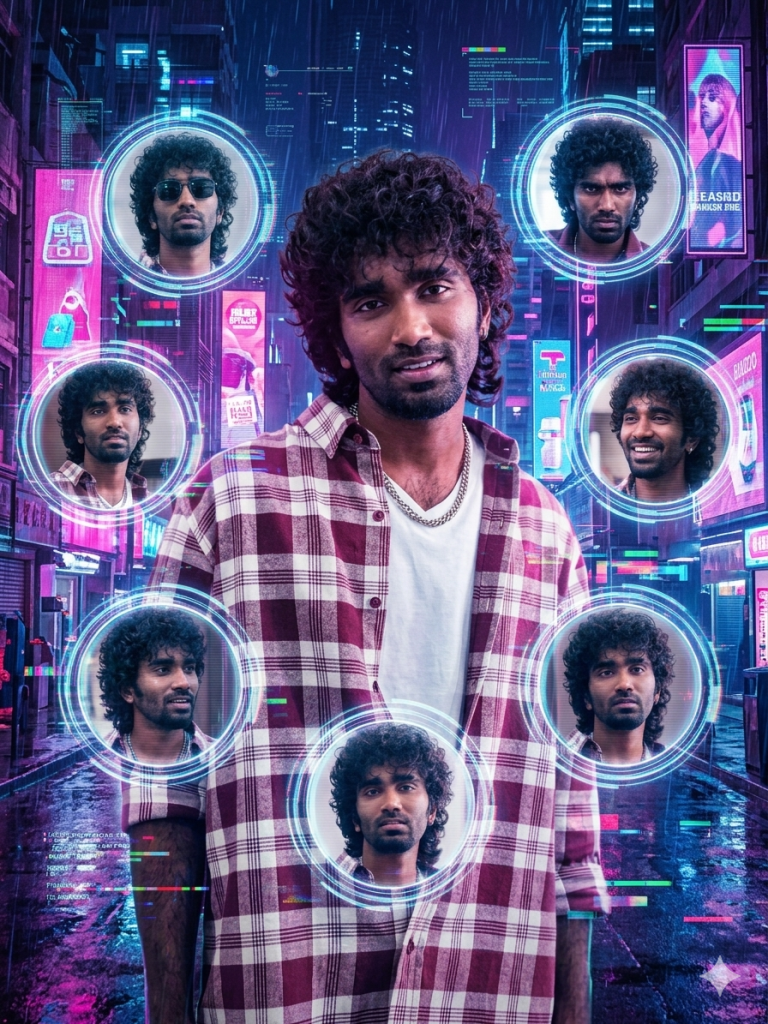
Around the main subject, arrange multiple circular frames orbiting or surrounding him, forming a visually balanced composition. Inside each circular frame, place different versions of the same subject, all matching the reference image but showing varied poses and expressions. Include variations such as a serious intense look, adjusting sunglasses with attitude, looking up at neon lights, a relaxed leaning pose, a candid smile, and a thoughtful expression. Each frame should feel like a separate captured moment of the same person.
Set the background as a neon-lit futuristic cyberpunk city with glowing lights and depth. The circular frames can have subtle neon borders or holographic effects to match the theme. Add glitch effects, digital distortions, and holographic overlays to enhance the futuristic look.
Keep the main subject in full color and sharp focus, while the framed versions can have slight glow or semi-transparent effects to create depth. Use vibrant neon colors like pink, blue, and purple with cinematic lighting. The final output should be ultra HD, highly detailed, crisp, and visually striking, with the central subject clearly standing out while the circular frames enhance the composition.
How to Use These Prompts
1. Below each image, you will see a prompt box with two buttons: Copy and Share to AI.
2. You can tap Copy to copy the full prompt manually. Or simply tap Share to AI; this will automatically copy the prompt for you.
3. After tapping Share to AI, a list of popular AI tools like ChatGPT, Gemini, Copilot, and others will appear on your screen.
4. Click on any AI tool you prefer. It will directly open the selected AI platform.
5. Once the AI page opens, paste the prompt into the prompt box (it is already copied if you used Share to AI).
6. Upload your reference image if required.
7. Click generate, and your image will be created.
8. If needed, you can slightly adjust the prompt for lighting, angle, or mood and generate again.
9. Once you are satisfied with the result, download the image and save it for your use.
Tips to Make The Prompts Better!
You can easily personalise these prompts to match your style, mood, and platform. Use the tips listed below to get better and more unique results.
1. Face Identity & Accuracy
- Always mention “use the provided image for exact face identity (100% preserved)”
- Add: sharp eyes, natural skin texture, no distortion
- If needed, include: same hairstyle, same expression
2. Outfit & Styling
- Change outfits based on your vibe:
- Casual: hoodie, t-shirt, streetwear
- Formal: blazer, suit, satin shirt
- Traditional: saree, kurta, ethnic wear
- Add accessories like watch, chain, sunglasses, rings for a premium look
3. Lighting Control
Lighting plays a huge role in realism:
- Golden hour → warm, soft, aesthetic
- LED/cool light → moody, cinematic
- Flash lighting → bold, high contrast
- Soft indoor light → clean and natural
4. Camera Angle & Composition
- Try different angles for better results:
- Eye level → natural look
- Low angle → powerful vibe
- Side profile → aesthetic feel
- Mirror reflection focus → cinematic style
- Add: shallow depth of field for background blur
5. Background & Environment
- Keep it minimal and clean for a professional look
- Or customise based on theme:
- Hotel room → luxury feel
- Car mirror → lifestyle aesthetic
- Black background → dramatic portrait
- Home setup → cosy vibe
6. Mood & Expression
You can control the emotion of the image:
- Confident & bold
- Calm & introspective
- Soft & smiling
- Serious & moody
7. Colour Grading & Style
- Add finishing styles like:
- Cinematic tone
- Warm vintage look
- Black & white editorial
- High contrast luxury style
- Use: subtle film grain for realism
8. Quality & Output Settings
- Always include:
- 4K or 8K resolution
- Aspect ratio: 4:5 or 3:4 (best for social media)
- Add: ultra-realistic, sharp focus, great detail.
Start with any prompt from this list, then tweak outfit + lighting + mood + background to create endless variations. Small changes can give completely new results.