Have you ever found an old photo that looks blurry, faded, or damaged? Over time, many precious memories lose their clarity because of scratches, and discoloration. With the help of AI and the right prompt mentioned here, you can restore those photos and make them look sharp, clean, and natural again. If you want to bring your old memories back to life, this prompt is for you.
A Few Examples We Restored Using This Prompt
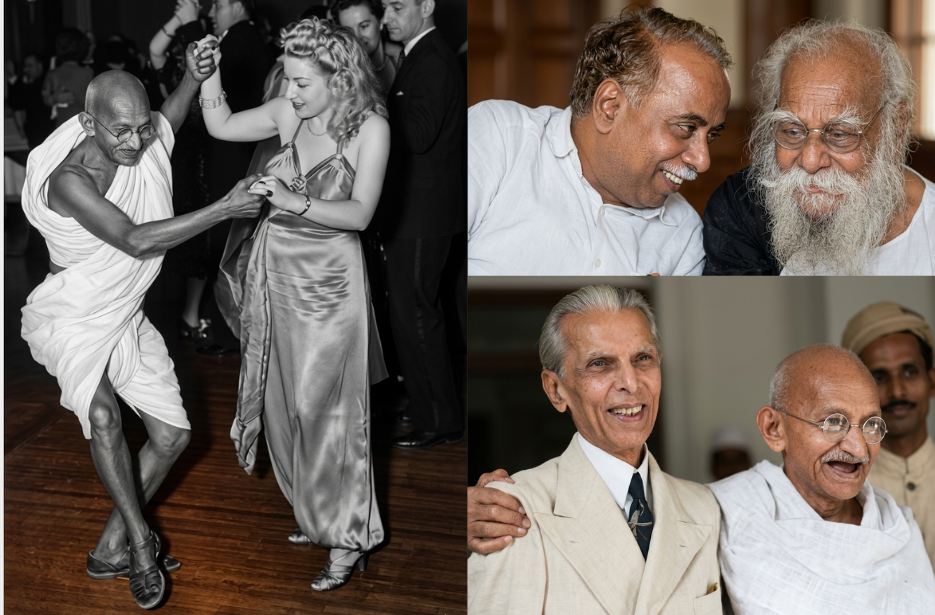
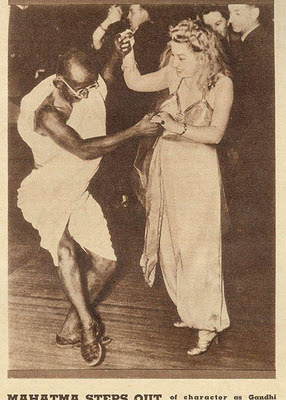
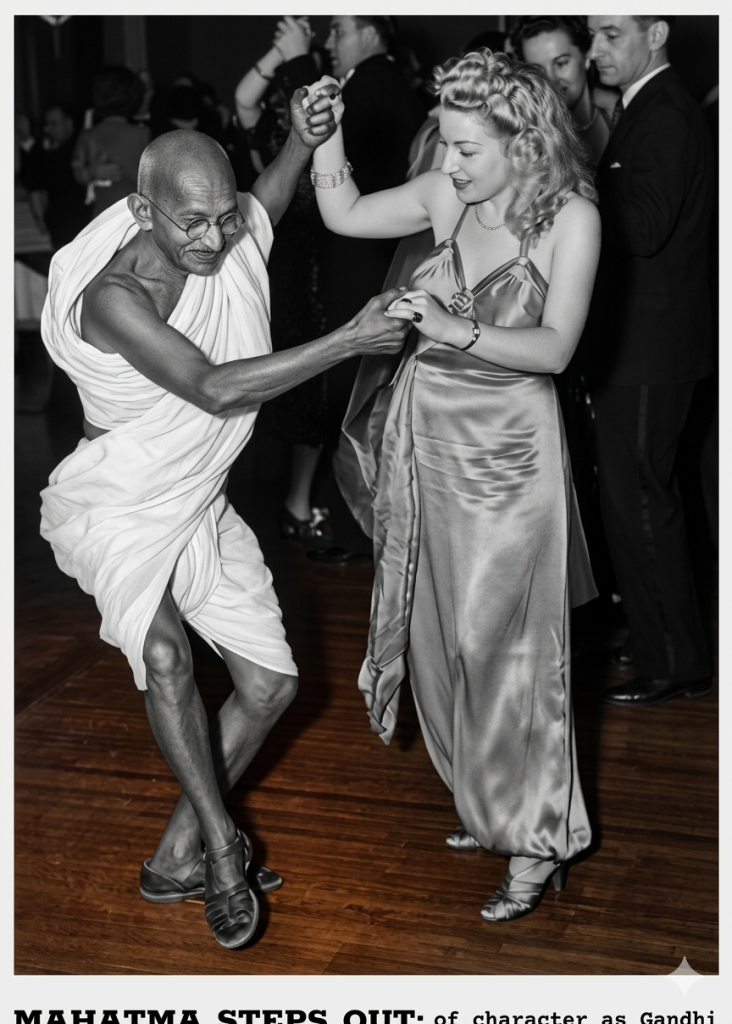
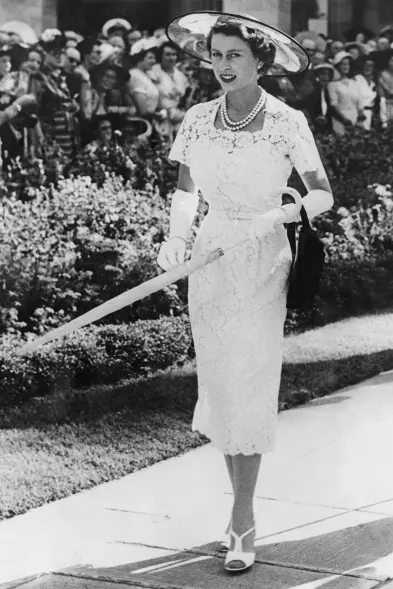
Here are a few images we restored using the same prompt to show how effectively it can enhance and bring old photos back to life.
1: Mahatma Gandhi Dancing on the Floor
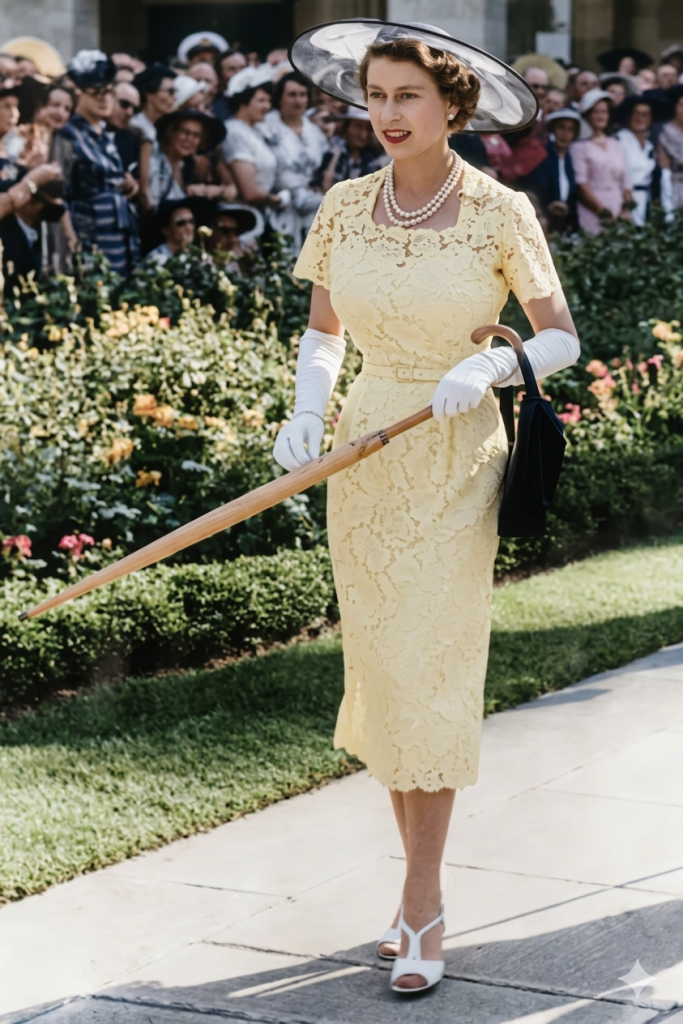
2: Young Portrait of Queen Elizabeth II
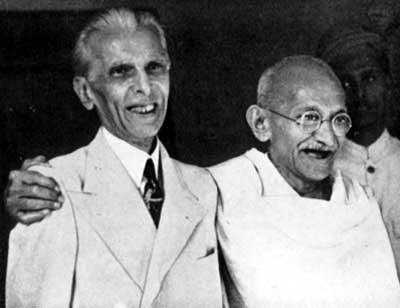
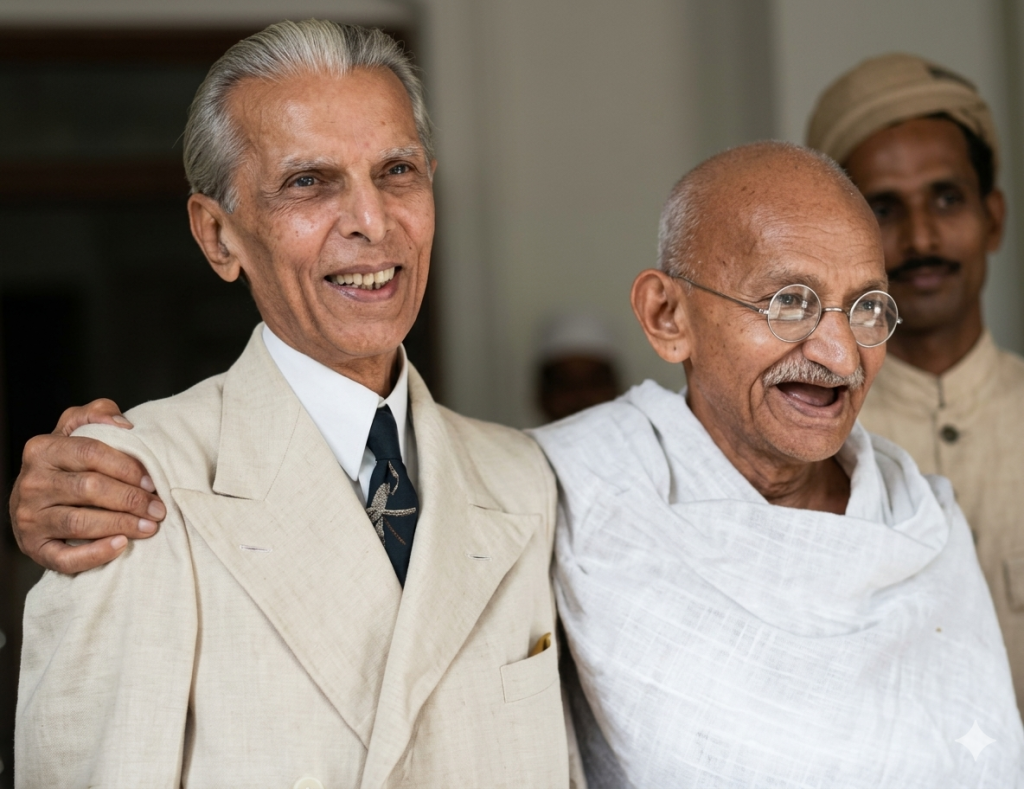
3: Mohandas Karamchand Gandhi and Muhammed Ali Jinnah
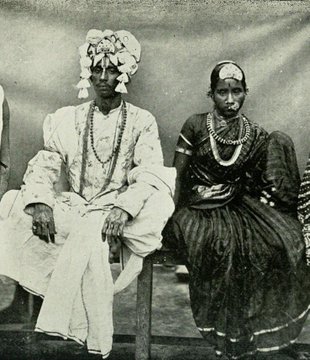
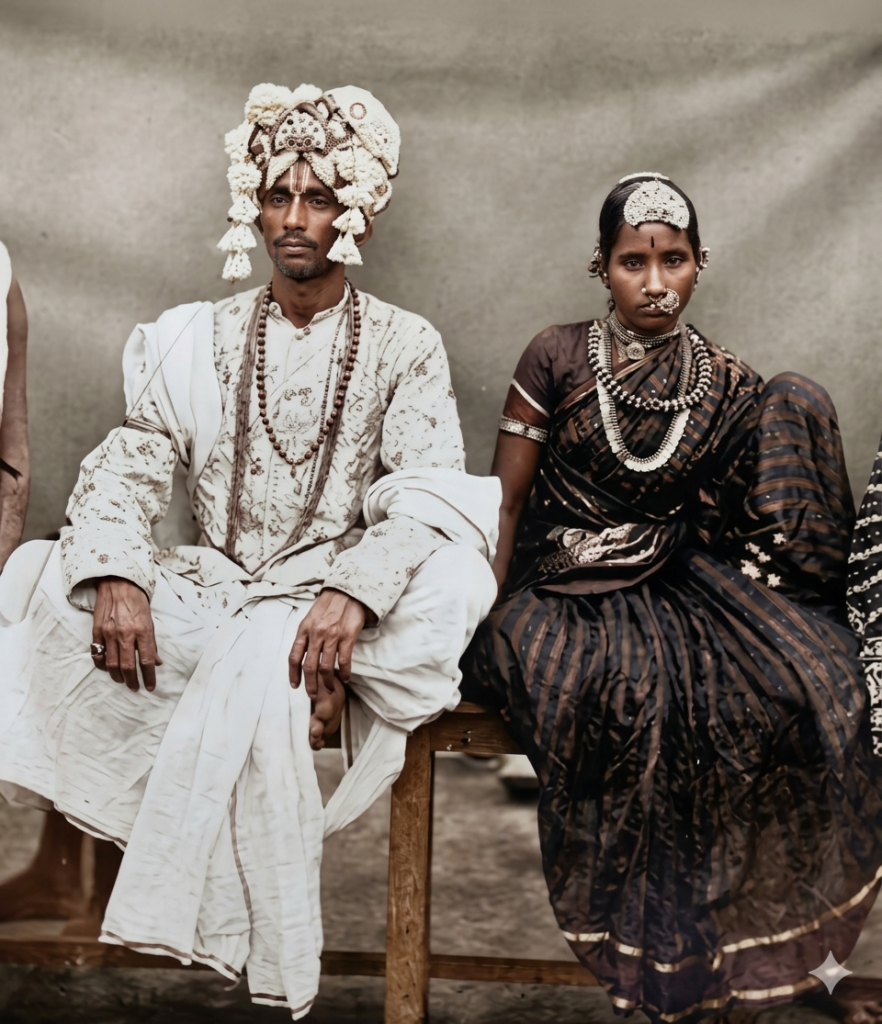
4: Real Ranabaali and Jayamma
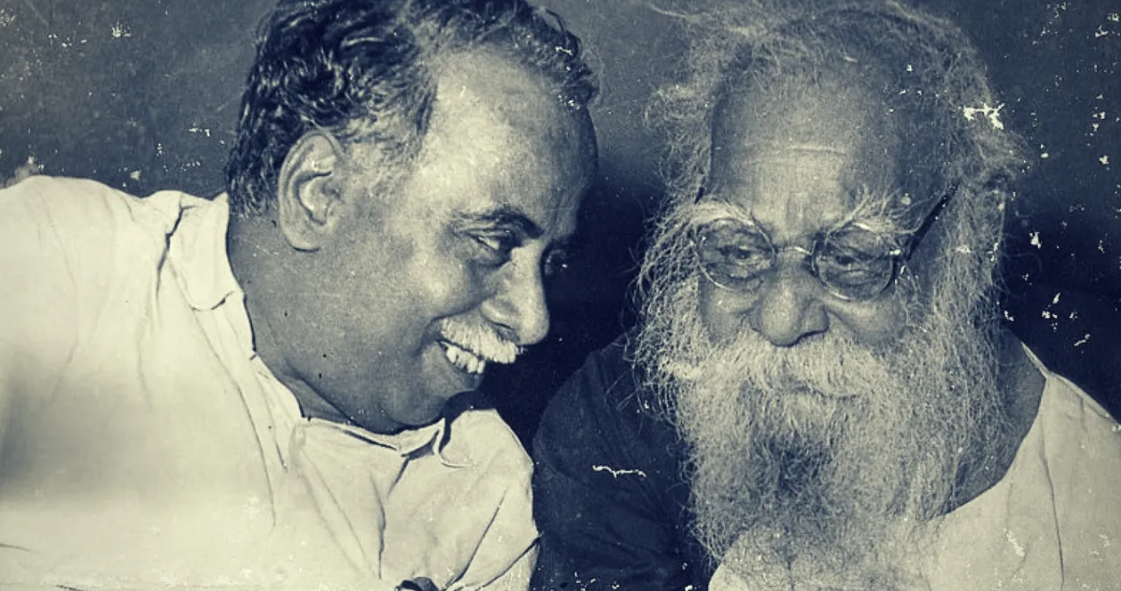
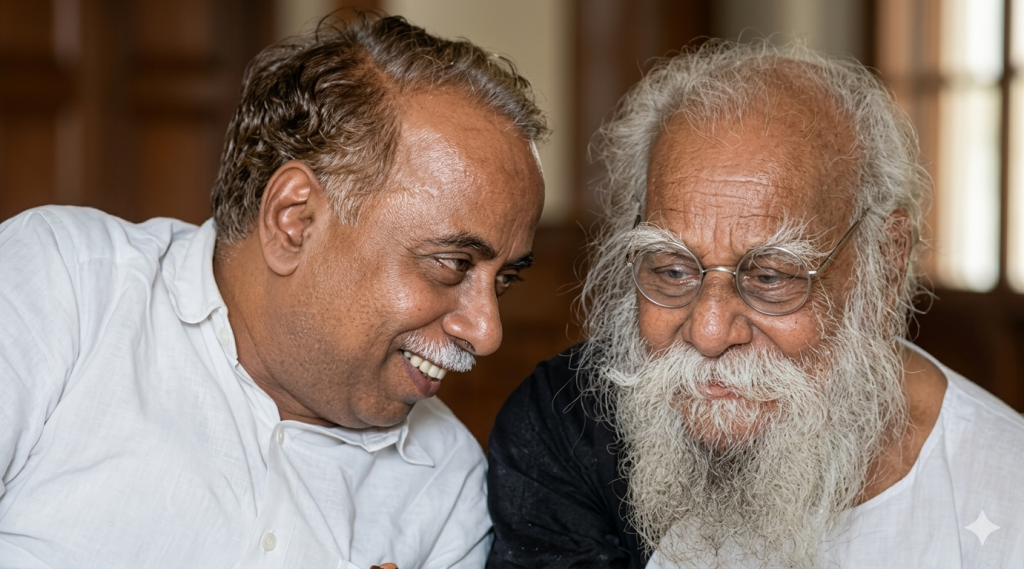
5: Thanthai Periyar and C.N. Annadurai
How to Restore Your Old Photos with Gemini AI
1. You can see a prompt menu at the top with two options – Copy and Share to AI.
2. Select Copy to copy the full prompt manually. Or tap Share to AI; this will automatically copy the prompt for you.
3. After tapping Share to AI, choose Gemini. If you have chosen the Copy option, visit the Gemini webpage.
4. Paste the prompt into the box (it is already copied if you used Share to AI).
5. Now, upload your old, damaged and blurry photo and click the Arrow icon. If needed, you can slightly adjust the prompt for lighting, angle, or mood and generate again.
6. Wait a few seconds while Gemini processes and generates the enhanced and more detailed version of the image.
7. Once you are satisfied with the result, download the image and save it for your use.
Customization Tips
You can slightly modify the prompts to get even better results depending on the AI tool you use.
1. Adjust Lighting
If the image appears too dark or too bright, add instructions like: “enhance cinematic lighting” or “soft natural lighting.”
2. Improve Face Matching
If the face swap does not look natural, include phrases like: “highly detailed face match” or “accurate facial identity preservation.”
3. Enhance Cinematic Style
To make the image look more dramatic, add styles such as: “epic cinematic color grading,” “film poster style,” or “ultra-realistic lighting.”
4. Adjust Camera Perspective
You can modify the viewing angle with phrases like: “slight low-angle shot,” “close-up cinematic portrait,” or “wide cinematic framing.”
5. Increase Image Quality
For sharper results, add quality terms like: “high detail,” “8K resolution,” or “ultra realistic textures.”
6. Experiment with Multiple Generations
Sometimes the best result appears after a few tries. Generate the image multiple times and pick the version you like the most.